
The gravimetric diluter is a piece of equipment that has become essential in food microbiology laboratories in just a few years.
It is THE central piece of equipment in the lab (standardization, traceability, productivity, etc.). So, when it’s time to change models, you really don’t want to get it wrong… otherwise, it can turn into a real nightmare!
In this article, we’ve listed and explained the main criteria to consider when purchasing a new gravimetric diluter. It will help you define your needs and save time when meeting with suppliers.
Enjoy reading, and happy shopping!
Table of contents:
- What is a gravimetric diluter used for?
- Technical specifications of a gravimetric diluter
- Practical features of a gravimetric diluter
- Metrology of a gravimetric diluter
- After-sales service, maintenance and metrology of a gravimetric diluter
What is a gravimetric diluter used for?
A gravimetric diluter is an instrument used in food microbiology laboratories to automate sample dilution. It helps increase productivity in food microbiology laboratories.
Example: A laboratory needs to weigh 25g of minced meat and add 225ml of diluent.
But achieving an exact weight isn’t always easy, and the technician might put 25.5g of meat into the bag instead of 25g.
With a gravimetric diluter, there’s no need to remove the extra 0.5g. The diluter automatically adds the required volume of culture medium to achieve an accurate 1:10 dilution.
Once dilution is complete, the balance will display 255g.
A gravimetric diluter is essentially a balance that communicates with a pump to perform fast and accurate dilutions… well, that was the original idea! Today, gravimetric diluters offer many other functions, including standardization and traceability. That’s why they’ve become central to food microbiology laboratories, where almost nothing can happen without them.
Technical specifications of a gravimetric diluter
Here are the main points to consider when purchasing a new diluter:
Weighing range
A diluter cannot offer a very wide weighing range, high precision and high speed all at once. It’s therefore important to list the sample weights you’ll need to handle:
- 1g (e.g., pharmaceutical and cosmetic applications)
- 10g – 100g (e.g., wipe testing)
- 25g – 250g (e.g., standard food microbiology applications)
- 375g – 3.75kg (e.g., pooled sampling in food microbiology)
Each application requires different accessories (bag holder, dispensing nozzle, tubing).
Depending on your applications, you may need two different diluter models.
Tip: List all the different weights your laboratory needs to measure, then rank them by frequency of use.
Balance precision
What level of precision do you need? 1g, 0.1g or 0.01g?
It’s important to check that the diluter provides the required precision, both when weighing the sample and after adding the culture medium.
Weight of the diluter
To prevent cross-contamination, microbiology laboratories regularly clean their workbenches. This means being able to lift and move the diluter. Its weight can therefore be an important selection criterion (although the stingiest laboratories might argue that it saves money on gym memberships!).
But remember: the heavier the diluter, the more… stable it is. Which is actually a good thing for a balance.
Tip: If you can borrow a demonstration unit, ask everyone who will need to move the diluter during routine use to try lifting and moving it.
Footprint of the diluter
Some diluters take up more space than others, and space is something we’re desperately short of in food microbiology labs (if only the chemists had a smaller lab!).
Don’t forget to account for the space required by pumps and accessories (barcode reader, printer, keyboard, etc.).
Tip: Decide where the diluter will be installed in your laboratory and measure the available space.
Number of pumps
A gravimetric diluter can be used with several diluents (BPW, Fraser, etc.). Each diluent requires at least one peristaltic pump (or two if you’re using the turbo option). You therefore need to list all the diluents used in your laboratory.
Motorized dispensing arm
Today, almost all gravimetric diluters have a motorized arm.
This means that once the target sample weight is reached, the arm automatically moves into position to dispense the culture medium.
Each diluter has a different arm movement (lateral, horizontal or vertical).
Tip: Check that the arm movement is compatible with your workspace and does not introduce contamination risks (for example, if the dispensing nozzle moves outside the sterile working area or comes too close to the sample or the operator’s hands).
Protection against liquid spills
We’ve lost count of how many times a dilution has been started without a bag, or with a badly positioned bag… The result? Diluent everywhere!
Besides making a mess, this can pose a serious risk to the diluter’s electronics (electronic boards around the balance opening, rear connectors, screen and keyboard).
Tip: Check what protective measures the supplier has put in place to avoid losing your cool (and frying an electronic circuit board)!
Available programs
Gravimetric diluters are used for several types of dilution. Make sure all the programs you normally use are available:
- Dilution program: Used for standard 1:2, 1:4, 1:10 or other dilutions.
- Dosing (or dispensing) program: This program dispenses a fixed volume of diluent, regardless of the weight of the bag. It is used for surface samples collected with wipes and/or sponges.
- Powder program: For powders, the liquid (diluent) must be added before the powder (to prevent powder from spreading everywhere and to avoid osmotic shock). This program first dispenses a volume of diluent. The microbiologist then adds the powdered sample, and the diluter dispenses a final volume of diluent to adjust the dilution.
Tip: List all the programs used in your laboratory. Ideally, rank them by frequency of use.
Compatibility with all sampling bags
Microbiology laboratories often use several types of bags: with side filters, full-page filters, no filters, and even small bags for sponges and wipes.
Is the bag holder compatible with all these bags? Do you need to change the holder depending on the bag type? If so, this could significantly reduce productivity.
It may therefore make sense to group samples by bag size or invest in two diluters with different holders.
Tip: List all the bags used in your laboratory and rank them by frequency of use.
Ease of programming
Usually, programs only need to be created once at the beginning. But with some diluters, this step can be really complicated… especially when you don’t do it very often.
It would be a shame to have to call the supplier every time you need to create a new program.
Tip: Take advantage of a trade show, seminar or equipment loan to try creating a program yourself.
Dilution traceability…
Traceability is one of the features that can save you (or cost you) a lot of time with a gravimetric diluter. It’s therefore worth spending some time clearly defining your needs.
If you don’t have a LIMS (otherwise, see the next section) and want to retrieve traceability data from your diluter, it’s important to list the information you’ll need (weight, operator, serial number, sample ID, etc.).
Ask the supplier how this information can be retrieved (USB, PC connection, printing, etc.).
Tip: Ask the supplier to send you a sample data export file. Check that it contains all the information you need.
… and LIMS connectivity
And now we’re entering the mysterious world of something microbiologists don’t always master… IT!!!
Every supplier will tell you that their diluters are compatible with a LIMS (unidirectional or bidirectional communication), but the reality is often much more complicated.
You can also ask your LIMS provider whether they’ve already connected a gravimetric diluter in another laboratory, or ask the diluter supplier whether they’ve previously connected one of their instruments to your LIMS.
Tip: Clearly define your needs and organize a meeting involving all three parties: your laboratory, the LIMS provider and the gravimetric diluter supplier.
Label printing
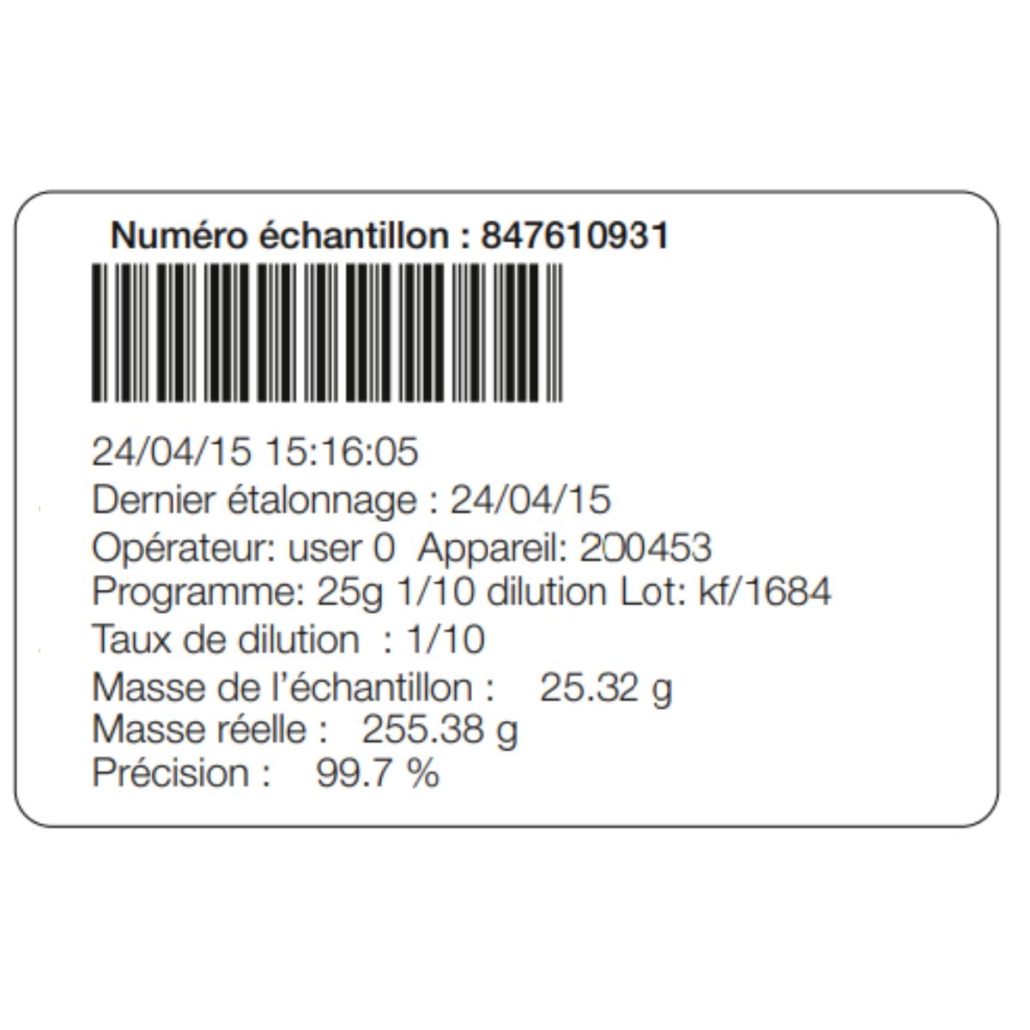
Still on the subject of traceability, gravimetric diluters can be connected to small thermal printers that print adhesive labels. Some laboratories need to print duplicate labels, so make sure this is possible (ideally automatically).
Tip: Ask the supplier to print a sample label so you can check that all the information you need is included.
Cross-contamination
A diluter must never become a source of cross-contamination. Depending on how you use it, some brands may be more or less prone to cross-contamination risks (biological safety cabinet, Bunsen burner, type of sample matrix, operators, etc.).
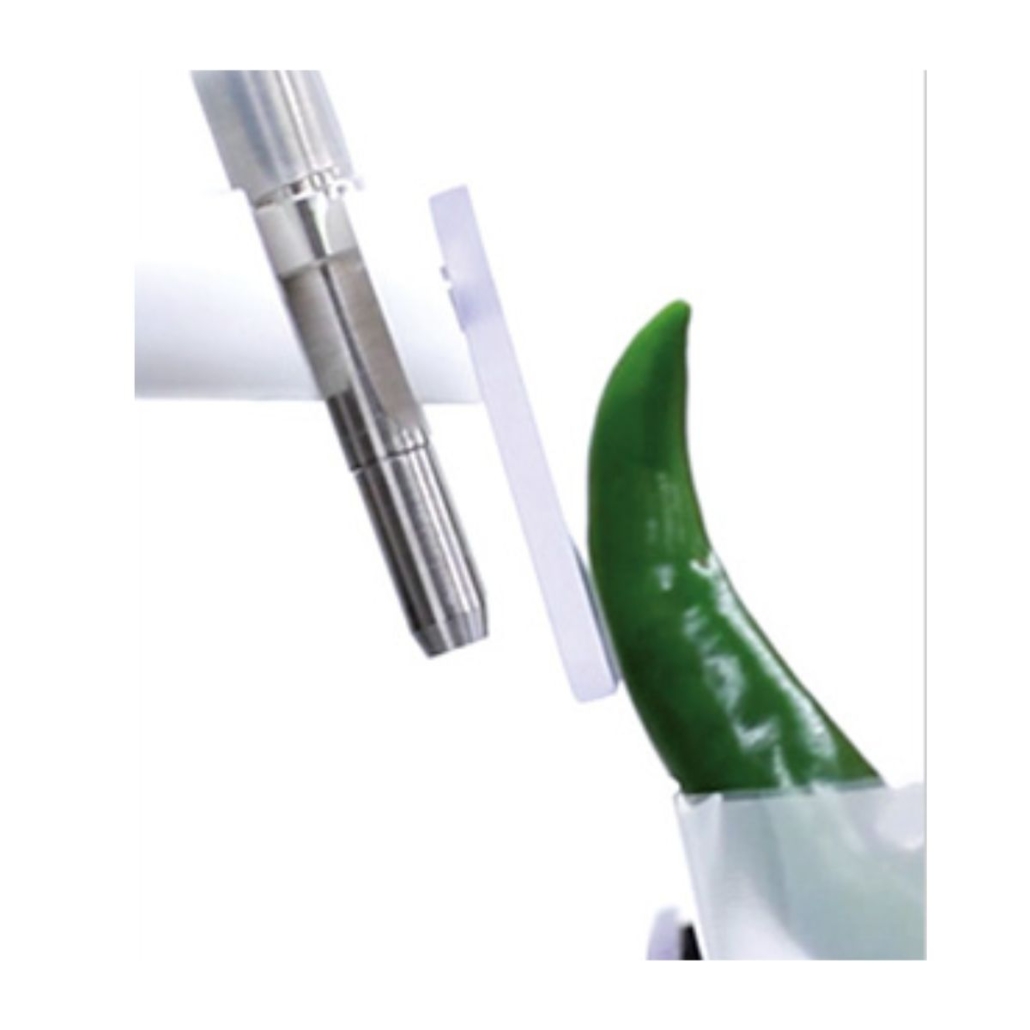
But what’s that green finger? Is it an elf?
Most cross-contamination occurs at the dispensing nozzle. Ideally, it should be positioned as far as possible from the operator’s hands and the sample… while remaining within the “sterile” working area.
Tip: Ask to test the diluter in your laboratory, with different operators and sample matrices.
Diluter accessories
There are plenty of accessories available for gravimetric diluters: printers, barcode readers, keyboards, PCs, foot pedals, etc.
Which ones do you really need? That often depends on your traceability requirements.
Be careful: the cost of accessories can significantly affect the total price of the diluter. Don’t forget to ask about them!
Cost of consumables
Consumables include tubing, stainless steel components (trocars, dispensing nozzles) and bag holders (be careful, plastic holders can be fragile).
They’re sold as accessories, but in practice, many are consumables, especially the tubing!
These consumables are a profitable business for manufacturers, so don’t forget to include their cost when evaluating the price of the diluter.
Tip: Ask the supplier to include the prices of all these consumables in the quotation for the diluter.
Practical features of a gravimetric diluter
Use under a laminar flow hood or BSC
In the past, all diluters were placed on a workbench next to a Bunsen burner… but those days are gone, since gas started being banned from laboratories (not because of its price, but mainly because of the safety risks).
Since then, more and more diluters have been installed inside biological safety cabinets (BSCs) or under laminar flow hoods.
If that’s your situation, here are the points to check:
- Balance stability (airflow may affect weighing).
- Diluter stability. The work surface inside a BSC may be thin, so pressing a button on the diluter (e.g., tare) could affect the balance.
- Limited working space. Inside a BSC, the front glass panel can make handling more difficult. It’s therefore important to choose a diluter with the lowest possible bag opening and minimal depth (so the bag remains as close as possible to the operator). Watch out for musculoskeletal disorders (MSDs)!
Tip: Ask for a demonstration unit and test it under real working conditions. Have all your technicians try it.
Dilution speed
A diluter is supposed to save the laboratory time (well, normally!!). So dilution needs to be as fast as possible.
To evaluate this, you need to consider both balance stabilization time and dispensing time. Indeed, when weighing a sample, some balances take longer to stabilize than others.
Tip: Test the diluter under your own working conditions and time the process. Don’t forget to test all the programs used in your laboratory (or at least the most frequently used ones).
Dilution accuracy
Most manufacturers offer several operating modes: either accurate but slower (the dilution finishes drop by drop for greater accuracy), or faster but less accurate (turbo mode).
In supplier brochures, you’ll often find the accuracy of one program and the speed of another…
Tip: Define your Maximum Permissible Errors (MPE, 2%?) and then test the speed… with every program!
Ease of use
A diluter is designed to increase laboratory productivity, so it should be possible to use it:
- With your eyes closed: You often need to switch between culture media, dilution ratios and operators. Are these program changes intuitive, quick and easy? This is a productivity tool, and all these hidden delays will reduce productivity and increase the risk of errors.
- Without damaging your joints. For example: Can the bag be positioned quickly? Ideally without raising your hands above shoulder level (risk of MSDs). Is the bag opening wide enough to insert the sample easily?
Taring
Taring means resetting the balance to zero after placing an empty bag on it. This can happen automatically (the diluter detects the empty bag and automatically resets to zero, known as auto-tare) or by pressing a button.
Test: Press the tare button and check that once the balance reaches zero, it remains at 0g.
The legend of auto-tare: According to a legend, auto-tare can introduce a bias. If you place feathers one by one into a dilution bag, you could theoretically add up to 1kg of feathers while the diluter continues to display 0g… Something to test in your lab.
By the way, which is heavier, 1kg of feathers or 1kg of lead?… OK, I know, I’m the one being a bit “heavy” here!
Automatic dilution start
This option automatically starts dilution as soon as the target sample weight is reached.
The advantage is that there’s no need to press a button to start dilution.
The downside is a 1- or 2-second delay to allow the operator to remove their hand (it may not sound like much, but in a production workflow, it can feel long).
Another point: if you haven’t removed your hand, the instrument will still start the dilution…
Tip: It’s often a matter of habit and working pace. Have everyone in the laboratory test both options.
Bag opening width
The width of the bag opening varies depending on the holder. The wider the opening, the easier it is to place the sample inside.
Tip: Get your rulers out, measure and test!
Bag attachment system
It’s still very common to see bags held in place with Patafix. The problem is that it doesn’t always stick very well and can potentially become a breeding ground for microorganisms (not ideal in a microbiology lab).
Over the past few years, more innovative solutions have appeared. They’re easier to clean and offer better grip… or not!
Tip: Check that the attachment system works with all your bags (sizes and filter types).
Ease of cleaning
One piece of adhesive putty that doesn’t hold properly, and suddenly there’s diluent all over the diluter. Even if you’re very careful, it’s bound to happen one day.
It’s therefore important to check how easy the gravimetric diluter is to clean. Ideally, avoid corners and hard-to-reach areas. Stainless steel may be easier to clean than plastic.
Tip: Walk around the diluter and inspect it carefully from every angle!
Metrology of a gravimetric diluter
Daily verification
Once or twice a day, technicians check the diluter’s balance. This is an accuracy check.
To do this, a reference weight is placed on the balance and the displayed weight is recorded. This helps identify any deviation in the balance. Most of the time, weighing results are recorded on a paper form next to the diluter. However, this function could be integrated directly into the instrument.
Does the diluter offer a program for this? And can it provide traceability for these checks?
Calibration
If a deviation is detected, it must be possible to calibrate the diluter’s balance. Access to the calibration program should be password-protected (to prevent accidental calibration).
Once inside the program, the balance must be calibrated at a minimum of two points: 0g (tare) and xg (depending on the reference weight available).
The calibration date is generally stored in the instrument.
Tip: Check that access to the calibration program is locked. Test the program to see how easy it is to use.
Metrology
Because each laboratory has its own metrology procedure, it’s difficult to integrate this step directly into the diluter.
Results are therefore generally recorded on paper or in an Excel file. However, it’s important to check whether your metrology procedure can be performed with the instrument:
- Does the bag holder allow reference weights to be placed at the locations where the metrologist needs to take measurements?
- Are the reference weights stable on the holder?
- Is the instrument’s resolution compatible with the metrology procedure (number of decimal places)?
Tip: During the trial period, ask your metrologist to perform a metrology test.
Installation and after-sales service for a gravimetric diluter
Installation and training
A diluter isn’t exactly a plug-and-play instrument. Don’t hesitate to ask the supplier how installation works and, above all, what training is provided (operation, program creation).
Suppliers generally know their instruments very well. By spending time with you in your laboratory and understanding the programs you’ll need, they can provide valuable advice to help you optimize the use of your diluter.
Tip: Ask for details about the installation and training process (number of people trained, number of hours).
After-sales service and maintenance
All manufacturers offer several levels of maintenance contracts.
What do these contracts include (replacement of wear parts, travel expenses, labor, etc.)?
If the diluter breaks down, the laboratory could come to a standstill. What response time does the supplier offer?
Can they urgently provide a loan instrument?
Purchasing through a distributor
If you’re purchasing your diluter through a distributor, don’t forget to ask who will handle the warranty and technical support.
Talk to other users
As we’ve seen, choosing a diluter is a major decision for a microbiology laboratory. Nothing should be left to chance.
Ideally, before getting started, take the time to define your needs (hopefully this article has helped!). Then talk to other gravimetric diluter users.
If possible, avoid relying only on contacts provided by the supplier. Instead, take advantage of trade shows, use LinkedIn or reconnect with an old university friend.
Once you’ve made contact, take the opportunity to discuss:
- Technology performance: Does the actual performance match what the manufacturer claims?
- Technology reliability: How many breakdowns occur each year?
- Technology limitations: Suppliers rarely talk about them, but every technology has limitations. Knowing them helps you avoid exceeding them!
- Supplier responsiveness when problems arise.
Trust in your supplier
There’s one final criterion, and it applies to every technology: the trust you have in your supplier!
This may seem subjective, but it’s important and can be based on tangible criteria, such as:
- Are they easy to reach by phone? Do you speak directly to someone or end up navigating an automated phone system?
- Have you worked with them before? If not, ask another laboratory for feedback (on LinkedIn or through SuperMicrobiologistes).
- Are they responsive and quick to provide solutions when problems arise?
When it comes to gravimetric diluters, it’s essential that the supplier allows you to test the instrument in your laboratory for at least two weeks.
Do you use a gravimetric diluter? Come and share your experience with us!
Don’t miss our next article! Subscribe to our newsletter here !



One Response